Use Remix IDE Plugin
This tutorial explains how to deploy and run Move modules with the WELLDONE Code Remix IDE plugin. This tool offers a graphical interface for developing Move modules.
Here are the steps to use the Remix IDE plugin for Move (described in detail below):
- Connect to Remix IDE.
- Select a chain.
- Install a browser extension wallet.
- Create the project.
- Compile and publish a Move module to the Aptos blockchain.
- Interact with a Move module.
Step 1: Connect to Remix IDE
-
Load the Remix IDE.
-
Accept or decline the personal information agreement and dismiss any demonstrations.
-
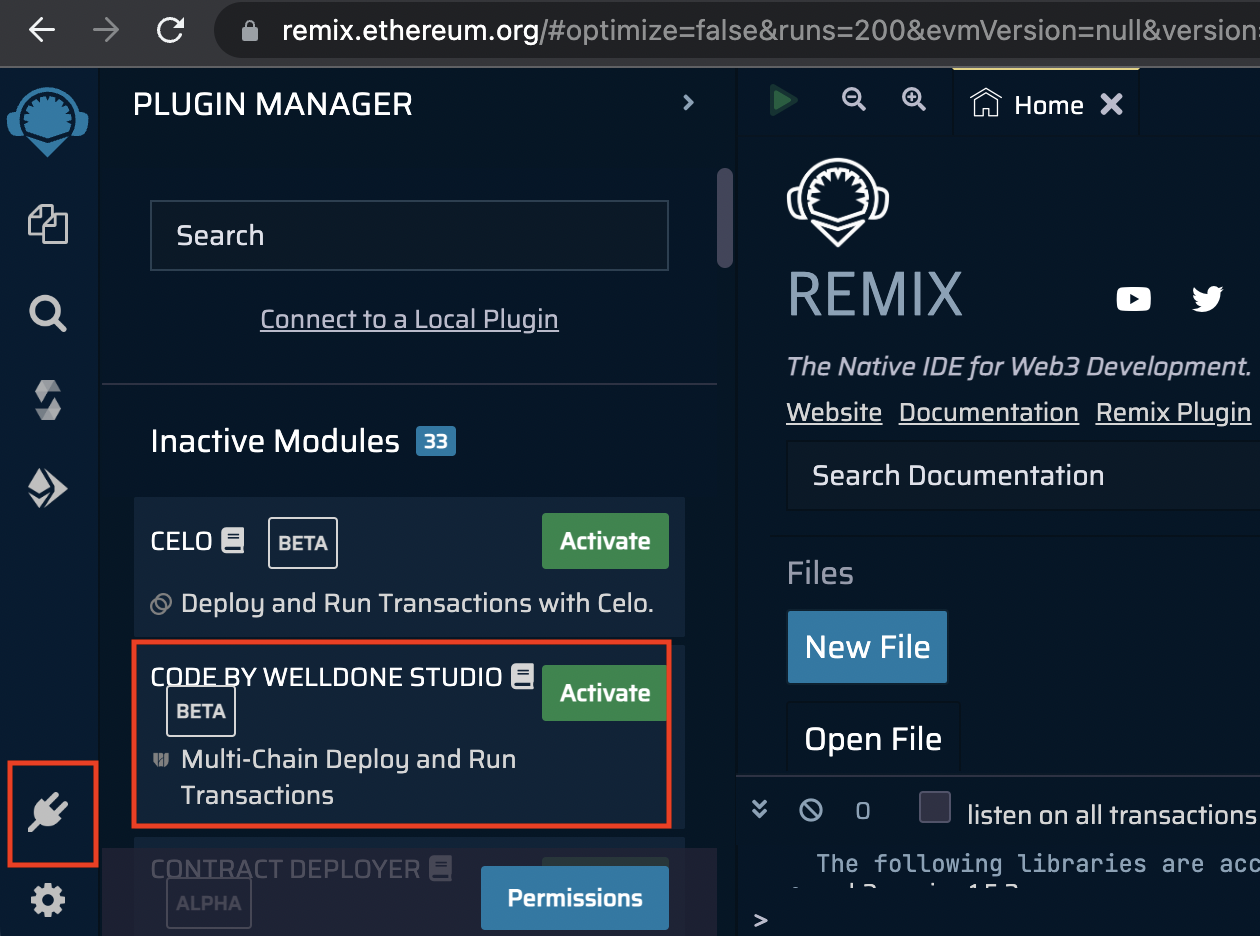
Click the Plugin Manager button near the bottom left, search for CODE BY WELLDONE STUDIO, and click Activate.

Step 2: Select a Chain
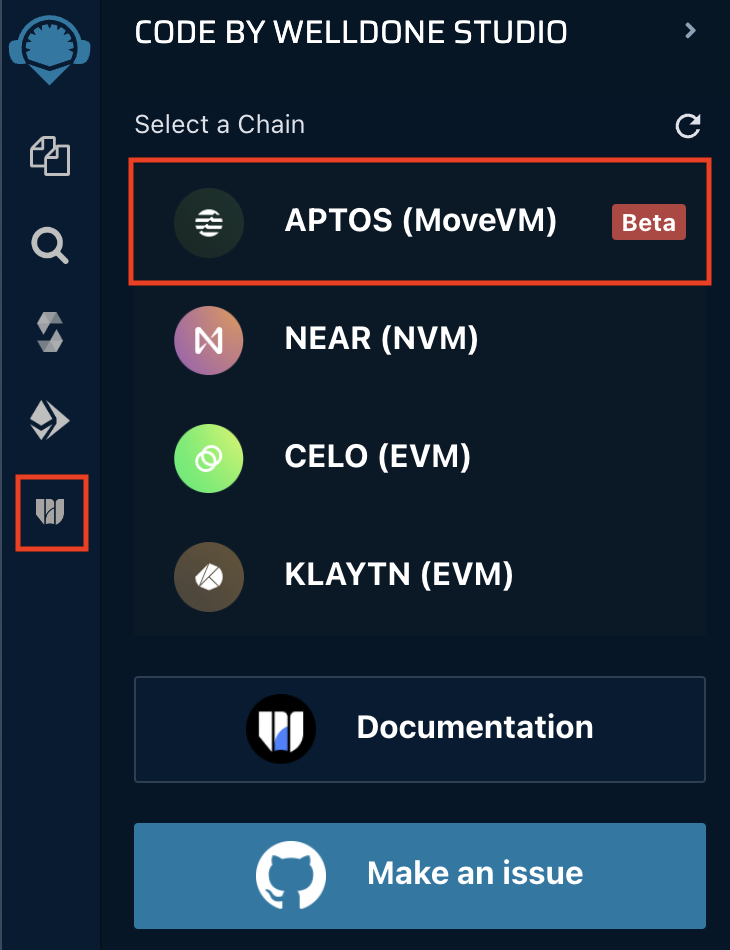
Click the newly created icon at the bottom of the left menu. Then, select Aptos (MoveVM) from the chain list.

Step 3: Install a wallet
WELLDONE Wallet can be used with the Remix IDE plugin now, with support for Petra wallet coming soon. See the list of Aptos wallets available in the ecosystem.
This steps assumes you are using the WELLDONE Wallet. Follow the manual to install the wallet and create an account for the Aptos blockchain. Once that is done, follow these steps:
- Choose a network (e.g. devnet) in the dropdown menu at the top of the main tab.
- Go into the Settings tab of your wallet and activate Developer Mode.
Now in the Remix UI click the Connect to WELLDONE button to connect to the WELLDONE Wallet.
Click the Refresh button in the upper right corner of the plug-in to apply changes to your wallet.
Step 4: Create the Project
In Aptos, you can write smart contracts with the Move programming language. WELLDONE Code provides two features to help developers new to Aptos and Move.
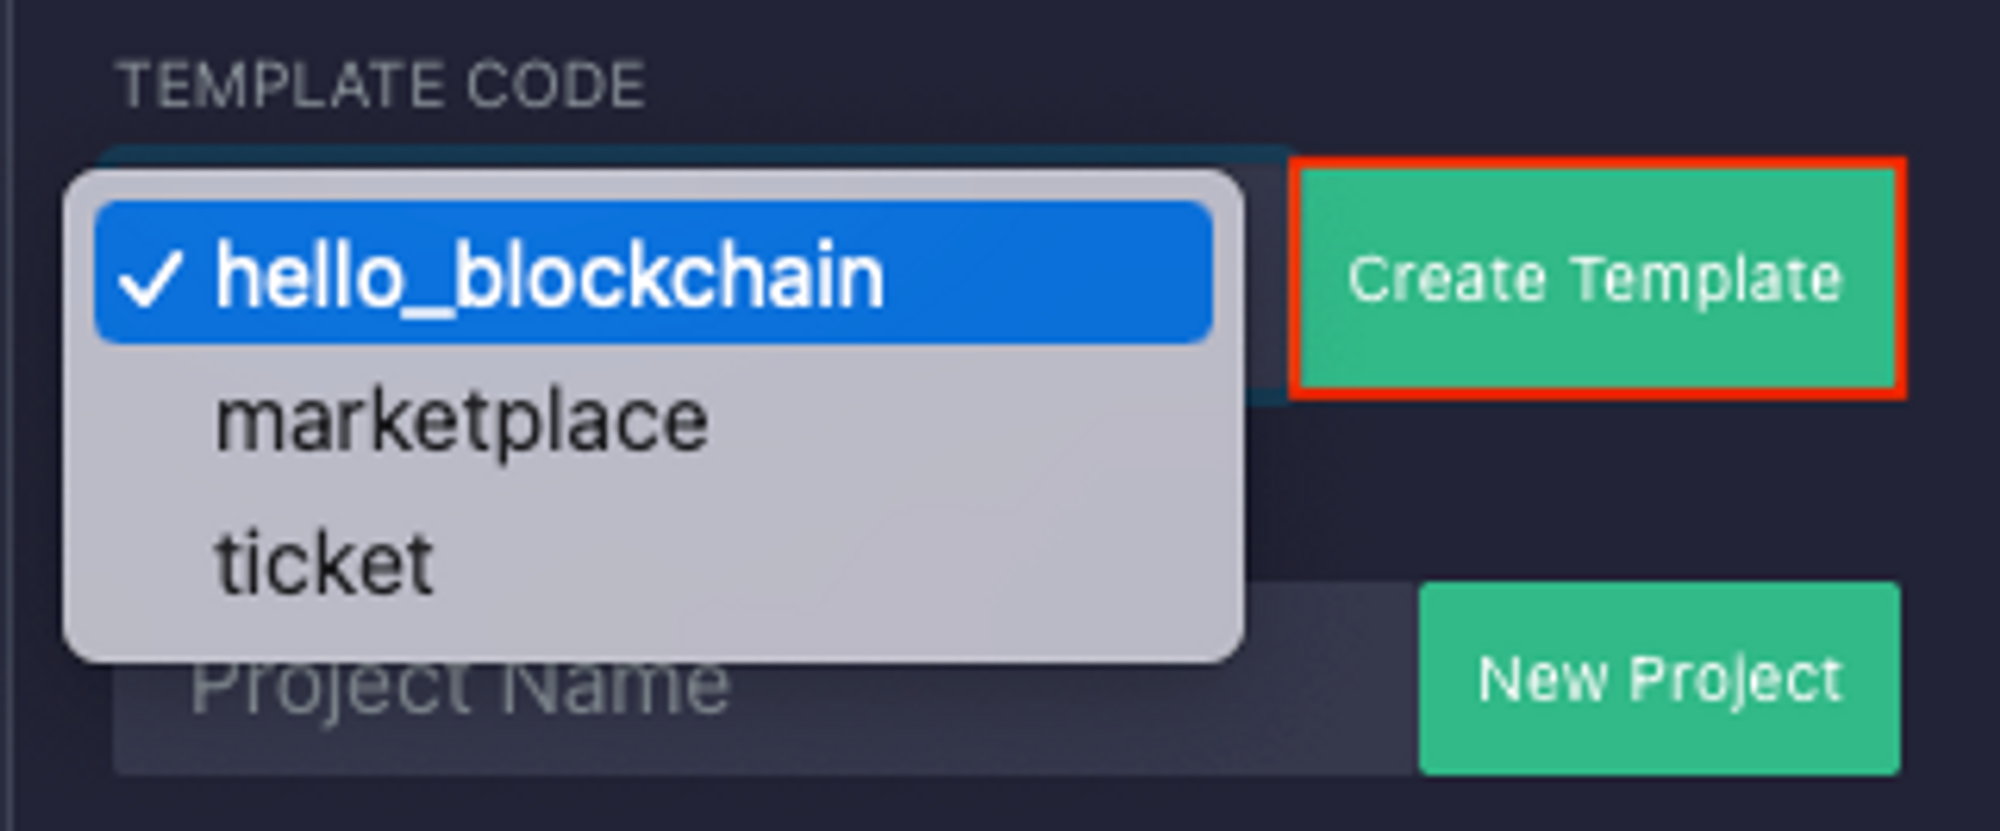
Select a template
Create a simple example contract code written in Move. You can create a sample contract by selecting the template option and clicking the Create button.

Create a new project
Automatically generate the Move module structure. Write a name for the project, and click the Create button to create a Move module structure.
You can create your own Move projects without using the features above. However, for the Remix IDE plugin to build and deploy the Move module, it must be built within the directory aptos/. If you start a new project, the structure should resemble:
aptos
└── <YOUR_PROJECT_NAME>
    ├── Move.toml
    └── sources
        └── YOUR_CONTRACT_FILE.move
Step 5: Compile and publish a Move module to the Aptos blockchain
- Select the project you want to compile in the PROJECT TO COMPILE section.
- Add your address to the
Move.tomlfile. - Click the
Compilebutton.
[package]
name = "Examples"
version = "0.0.0"

[addresses]
hello_blockchain = "your address"

[dependencies]
AptosFramework = { git = "https://github.com/aptos-labs/aptos-core.git", subdir = "aptos-move/framework/aptos-framework/", rev = "aptos-node-v1.2.0" }
- When the compilation is complete, a compiled binary file is returned in the
aptos/<YOUR_PROJECT_NAME>/outdirectory.
If you need to revise the contract and compile again, delete the out directory and click Compile once more.
- Once you have compiled contract code, the
Deploybutton will be activated.
Step 6: Interact with a Move module
There are two ways to import contracts.
- Automatically import contracts deployed through the above process.
- Import existing deployed contracts through the At Address button.
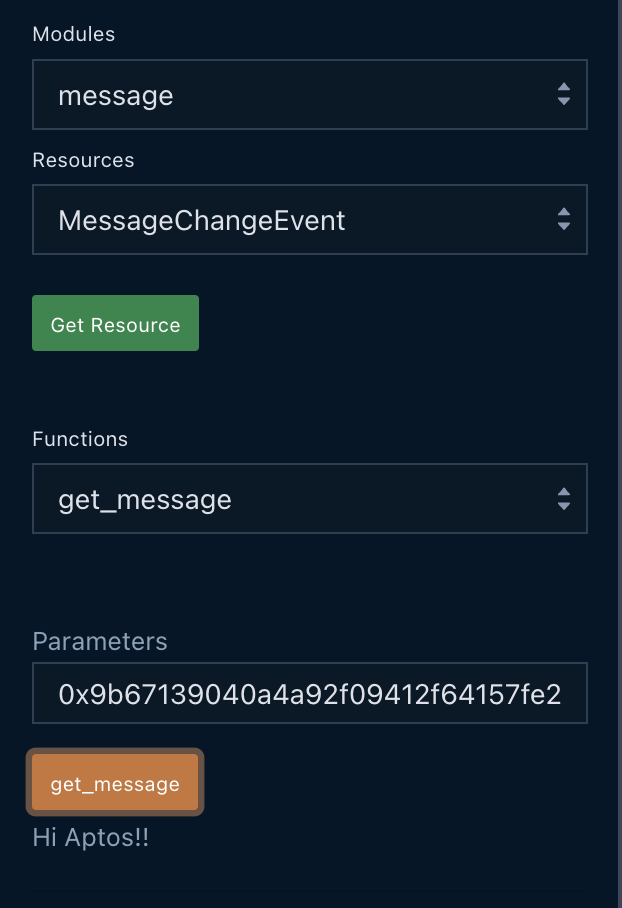
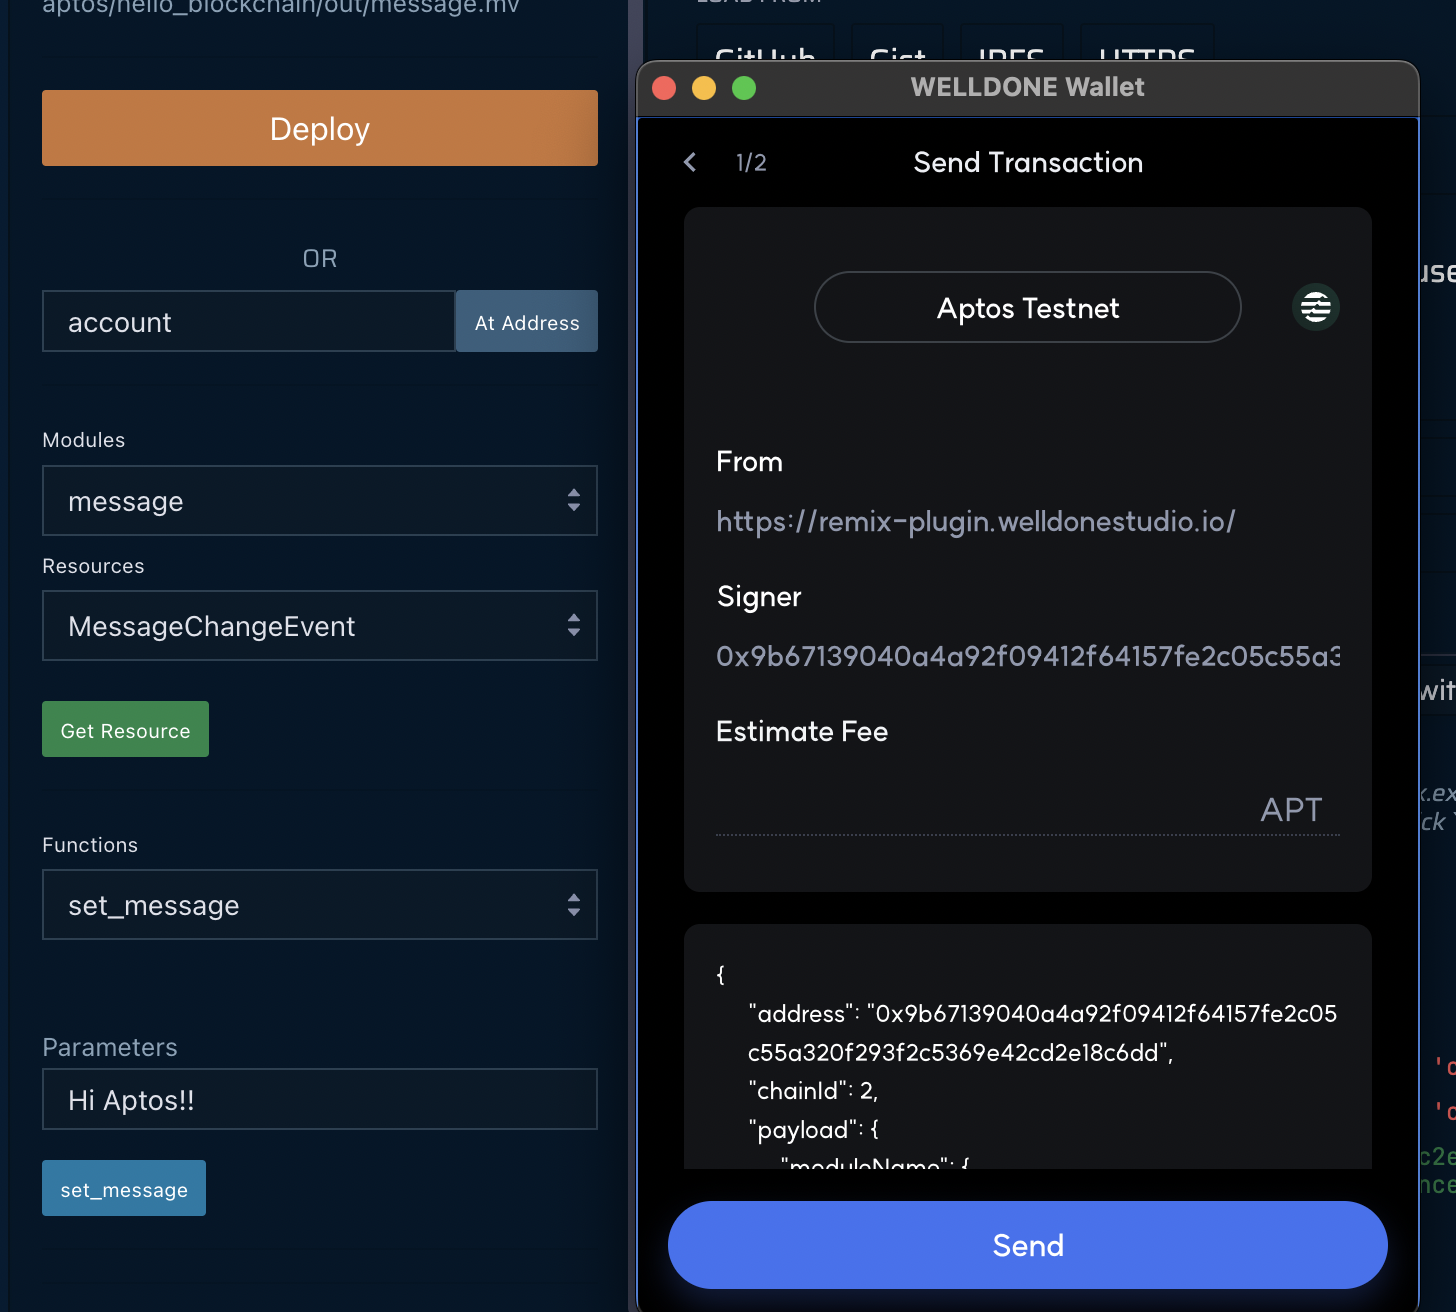
- Check the modules and resources owned by the current account and read the resources through the Get Resource button.
- You can select a function, enter parameters as needed, and click a button to run the function. For an entry function - not the view function - a signature from the WELLDONE Wallet is required because the transaction signature and request are required.


Get support
Click the Documentation button to seek help with this Remix IDE plugin. To file requests, click the Make an issue button to go to the welldonestudio GitHub Repository and file an issue.